World’s Easiest Tomato Soup

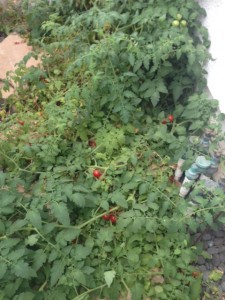
My next door neighbor grows organic produce in a green house next door. Seeds from one of his plants must have made it over to my side of the fence because a tomato plant appeared on the side of my house growing next to the electrical meter.


My wild tomato plant!

My wild tomato plant!

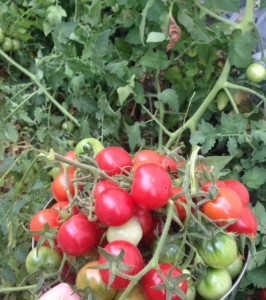
It was so interesting to me because I never planted it, never watered it, it’s not an area where there’s even a lot of dirt – and yet, it persisted. I let it go to see how large it would get. I ended up with more Cherry Tomatoes than I knew what to do with. Life is full of wonderful surprises!


Wild Urban Tomatoes

Wild Urban Tomatoes

So, what to do with all of these Cherry Tomatoes? Even though it’s Summer here at the beach, it rained quite a bit this month of August. It actually poured a few nights with thunder and dangerous lightening. So soup works – even in the Summer. This recipe is so easy.


  • Tomatoes (Cherry or other cut in 1/2 or 1/4s)
  • Filtered water (cover the tomatoes)
  • 1 Clove Garlic
  • Salt and Pepper to taste


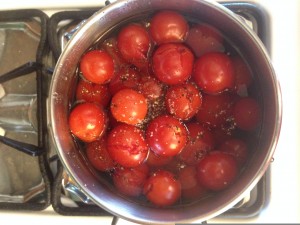
When life gives you tomatoes...

When life gives you tomatoes…

Put all ingredients in a pot and cover with water.


Simmer for several hours adding more water as needed.


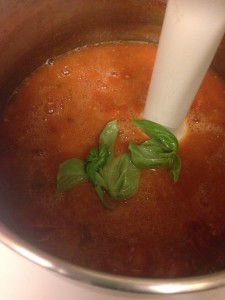
Add fresh basil if you’d like after cooking. Or, you can also add a pinch of dried Oregano. Some people add bread to thicken the soup. But you can add nothing at all. 


I love my little "handblender".

I love my little “handblender”.

Blend to smooth.


If your tomatoes have many seeds as mine did, you will need to strain after blending. 


My daughter likes me to stir in a little cream or half and half to give the soup a little creamy flavor. 


Put in bowls and enjoy! Or, if you’re throwing a party, soup in shot glasses is a great appetizer option when carried around on trays and passed out to your guests. 

 

Authentic Mexican Red Enchilada Sauce

My son has Celiac and cannot eat flour so I was really disappointed when I saw that my favorite “go to” canned red enchilada sauce was not gluten free because it contains wheat flour as well as some other ingredients with names I could not pronounce properly. But my problem was easily remedied when I asked Maria (someone I work with) for her enchilada sauce recipe and of course, what a bonus that it was so easy to make! She only adds garlic and water, I added onions and spices. Now I make enchiladas from scratch at home all the time and they are far less expensive than buying them  “to go ” from any of the local neighborgood Mexican restaurants! While the sauce recipe calls for dried Guajillos which Maria said are the best to use, I love Ancho Chilis and you can combine the two. Or, you can experiment with other types of chilis, all of which are really inexpensive – another bonus!


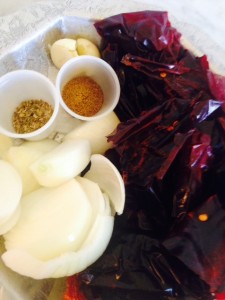
Dried Guajillo or Ancho Chilis are the main ingredient in Red Enchilada Sauce.

Dried Guajillo or Ancho Chilis are the main ingredient in Red Enchilada Sauce.

To make the sauce:


  • 10 (or so, what is in one small package) Dried Guajillo Chilies (I purchase them at a Mexican market or my local Fresh n Easy market carries them which is so convenient).
  • 1/2 Yellow Onion sliced or chopped
  • Small pot of water or broth
  • 1-2 Cloves Garlic
  • Pinch of Oregano 
  • Pinch of Cumin 
  • Cayenne if you want it spicier (optional)
  • Salt and Pepper to taste


Remove the stems and some of the seeds from the Guajillos (or remove all the seeds if you do not want it spicy).


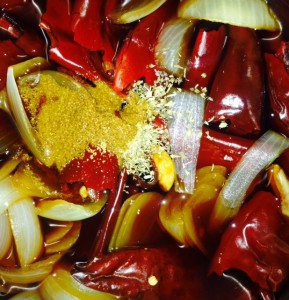
Simmer chilis until soft. Then add spices.

Simmer chilis until soft. Then add spices.

Add the chilis, onions and the garlic to the pot and add enough water to cover the chilis well.


Bring to a simmer and simmer the until the chilis are soft and bend easily. 


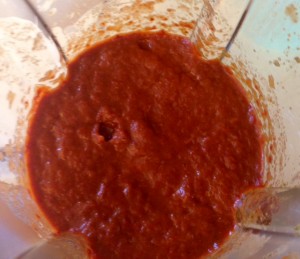
Drain first. Then blend. Add fresh water back in as needed.

Drain first. Then blend. Add fresh water back in as needed.

Drain about half the water out from the pot and then place the chilis with the garlic, onion and spices in a blender. Blend. Add fresh water back in to thin the sauce as you prefer. 


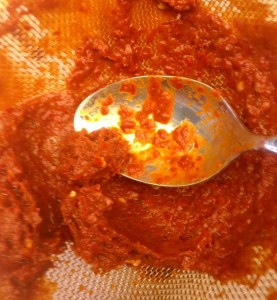
Scrape Sauce through Strainer with a spoon.

Scrape Sauce through Strainer with a spoon.

Strain through a strainer over a larger, clean container. (Scrape the sauce back and forth with a spoon until the sauce drips through.)


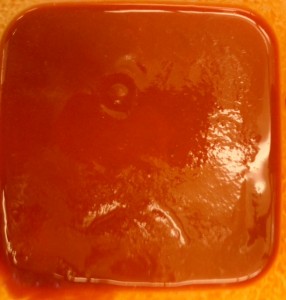
Finished Enchilada Sauce.

Finished Enchilada Sauce.

The enchilada sauce will now be very smooth and ready to pour over chicken or to use in any traditional red enchilada recipe.


Hong Kong Milk Tea

Iced tea is one of my favorite homemade beverages to make and keep in the fridge. Not only is it as easy as boiling water (and adding and removing the tea bags ) but its also an amazingly inexpensive alternative to other store-bought beverages and therefore

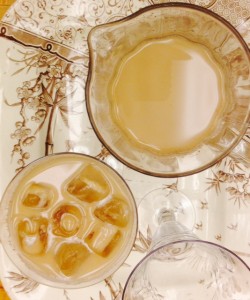
Sweet and luscious. Easy Hong Kong Milk Tea.

Sweet and luscious. Easy Hong Kong Milk Tea.

extremely budget-friendly. Snapple-like mixtures are easy to recreate by adding lemon, berries, mint, cucumber or other fun additions from the garden.  


Instead of adding sugar, you can add any sweetener you like such as honey, agave, Stevia or even no sweetener at all so it’s also easy to make your own “diet” iced tea blends. Use Almond Milk if you are a Vegan.


This tea is my daughter’s favorite and like all the recipes I share here, amazingly easy. Because I don’t really like the flavor of Green Tea but it has excellent health benefits, I sometimes add a Green Tea bag in with the Black Tea  which masks the flavor of the Green Tea completely. I also love making this tea with Earl Grey tea. 


  • 5 Black Tea bags
  • 1 Quart Water
  • 1 can of Condensed Milk (sweetened or unsweetened) or 1 C Cream or  1 1/2 Cups Half and Half or Milk, or 1 Cup Almond Milk 
  • 1/2 Cup Sugar (omit if you are using sweetened milk. You can also add any preferred sweetener).


Tear the paper tops off of the tea bags and place in a pot full of water.


Add the sugar or sweetener to allow it to melt into the water when heating.


Bring water to a boil, then turn off the flame and let the tea bags steep for 10 minutes or longer if you prefer until the color of the water is nice and brown.


Remove the tea bags, pour the tea into a pitcher, add the condensed milk or other milk. Mix, chill and enjoy with or without ice. 


Homemade Limoncello

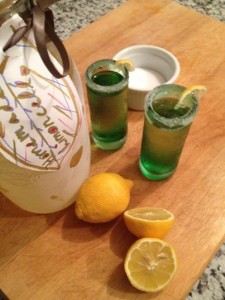
I love making gifts for people. And, food gifts are especially nice because they think of you and how much time and love you put into their gift while enjoying it. One of the items I love to make is homemade Limoncello. Living in California, it’s easy to grow lemons. The tree I planted only a few years ago is now blessing me with lemons on a regular basis. While we’ve contemplated moving to other places, I’m not sure I could live anywhere that I couldn’t have a lemon tree. Luckily for everyone, lemons are always available in every market. Be sure to use only organic lemons since the skin is what is used for this recipe.


I tried making a batch with herbs and a batch with Vanilla bean and they were not as good as the original, simple Italian recipe. You can double this recipe easily if making several bottles. 


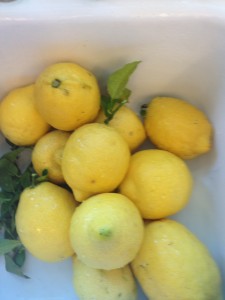
One of the benefits of living in California is being able to grow your own Lemons.

One of the benefits of living in California is being able to grow your own Lemons.

  • 12 Lemons (Organic) 
  • One 750 ml Bottle Vodka or Everclear*
  • 4 Cups Sugar (or less if you prefer)
  • 4 Cups Filtered Water


After rinsing and drying your organic lemons, use a potato peeler (my favorite is Cutco brand) to peel off all of the top yellow layer of the lemon skin (you do not want to get much of the white “pith” as it is a little bitter). 


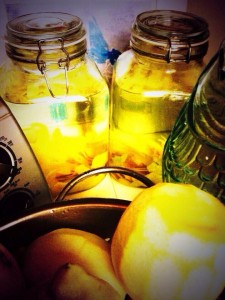
Put the lemon peels into a sealable glass gallon container that has been sanitized in your dishwasher or if you don’t have a dishwasher, boil the container and it’s lid in pot full of water for at least 15 seconds. 


Add the alcohol. If you are using Everclear, *add an additional 2 to 3 cups of filtered water to dilute it a bit since Everclear is 190 proof. 


Let your lemon and alcohol sit for anywhere from 2 weeks to 2 months before adding the simple syrup and bottling.

Let your lemon and alcohol sit for anywhere from 2 weeks to 2 months before adding the sugared  syrup and bottling.

Put into a dark place and let sit for a couple of weeks to a couple of months. The longer you let it sit, the better it will taste.


When ready to bottle, make your simple syrup by heating filtered water in a pot on a medium flame, add your sugar and stir until it’s melted in and then immediately remove from the heat and let cool completely. 

Meme enjoyed the Limoncello I made for her recently. This makes me happy!

Meme enjoyed the Limoncello I made for her recently. Yay!

Add the cooled simple syrup to your lemon and alcohol mixture and stir. Strain into bottles and enjoy! Throughout the year, I like save my clear Tequila and Vodka bottles to reuse for Christmas gifting. 

 easy limoncello recipe great food gift